This guide includes the steps to install Ableton Live 12 on Push (standalone).
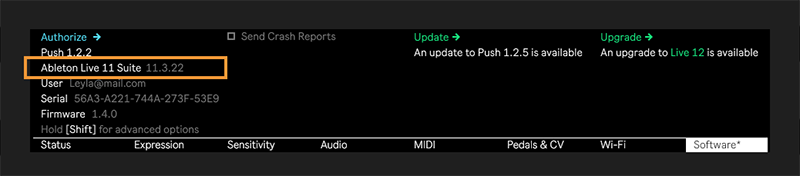
First, check the version of Ableton Live installed on your Push (standalone). Press the Setup button > Software tab to view the Live version on the left side of the display.
If your Push is running Live 11, follow the steps below starting with Step 1.
If you have installed Live 11 Beta or 12 Beta on your Push, first follow the steps in this guide to switch to the Live 11 release version before upgrading to Live 12: Switching Push (standalone) from the beta version to the release version.
Requirements to install Live 12 on Push (standalone)
Activate upgrade from Push
Authorize Live on Push
1. Requirements to install Live 12 on Push (standalone)
- Confirm that you have a Live 12 license in your Ableton account.
- Connect Push to your network, via Wi-Fi or ethernet. To upgrade Live on Push, you need a phone or computer that is connected to the same network as your Push. For how to connect Push (standalone) to your network, visit the article Push 3 Wi-Fi and Ethernet Connections.
2. Activate upgrade from Push
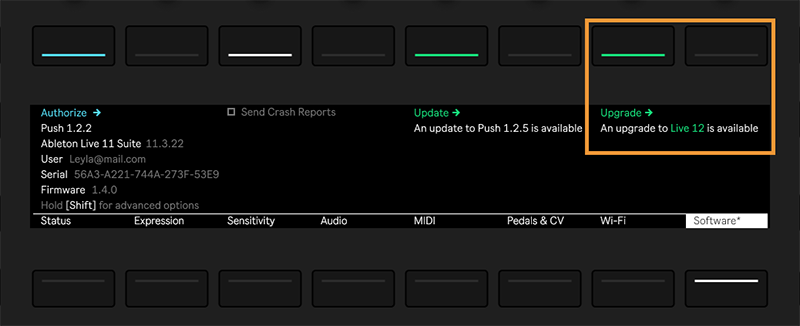
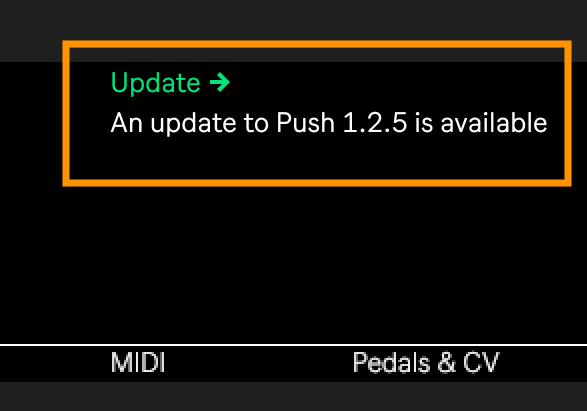
- Press the Setup button > Software tab. Push will automatically detect if a Live version upgrade is available, and display a notification on the right side of the screen.
- For more information on updating Push (standalone) software, visit Setting up Push (standalone): Update Software.
- Use the upper display button to press Upgrade. Push will prompt you to confirm that you’d like to upgrade.
- Use the display buttons to confirm and continue.
- Follow the instructions on the display to connect your phone or computer to Push via the URL provided.
3. Authorize Live on Push
- After entering the URL displayed on Push in Step 4 above in your web browser, Push will connect to Ableton.com.
- In your web browser, log in to your Ableton account.
If you have a single Live 12 license in your account, Push will then authorize automatically. If you have multiple licenses, choose the one you’d like to use with Push from the dropdown menu. - Once you see the page “Push Authorization” in your web browser, check the Push display. If the authorization was successful, Push will begin downloading and installing Live 12. You will see the notification "Push is updating to 2.X."
- Push will restart automatically when the upgrade is complete. After upgrading, in Setup > Software, Push will display Push 2.x and Live 12.x
For more information about Live 12 on Push, visit the Live 12 on Push Release Notes.
For how to downgrade the Live version installed on Push, you can follow the same steps to manually install the desired version listed in Switching Push (standalone) from the beta version to the release version.